
How to clone your voice on your iPhone or Mac

One feature you may not be aware of on your iPhone or Mac is Personal Voice—it was only introduced in iOS 17 and macOS Sonoma. It essentially creates a clone of your voice that you can then use in a variety of apps.
It was designed as a groundbreaking accessibility feature for those at risk of losing their voice, giving them the ability to continue speaking digitally even when they are no longer physically able to do so. However, it is something that anyone can use through their Apple devices.
Even if your voice works just fine, Personal Voice is an interesting feature to explore and set up—and a hint of what kind of technologies artificial intelligence may enable in the years to come.
Machine learning is used on-device to do the necessary processing, so all of your recorded audio stays on your devices and is not sent back to the cloud. (If you choose to share the data between devices, it is encrypted via iCloud.) Thanks to Apple’s built-in protections, no one can use the technology to impersonate you on calls or recordings.
How to set up Personal Voice
From a software perspective, you’ll need iOS 17, iPadOS 17, or macOS Sonoma—or later—to set up Personal Voice. For hardware, you’ll need an iPhone 12, 5th-generation iPad Air, 3rd-generation 11-inch iPad Pro, 5th-generation 12.9-inch iPad Pro or later, or a Mac with an Apple Silicon chip (M1 or later). Recording takes about 15 minutes, but you don’t need to do it all at once.
If you are using an iPhone or iPad, go to Settings and then tap Accessibility, Personal voiceAnd Create a personal voice. On a Mac you will find the same Accessibility Option by opening the Apple Menu and select System settings.
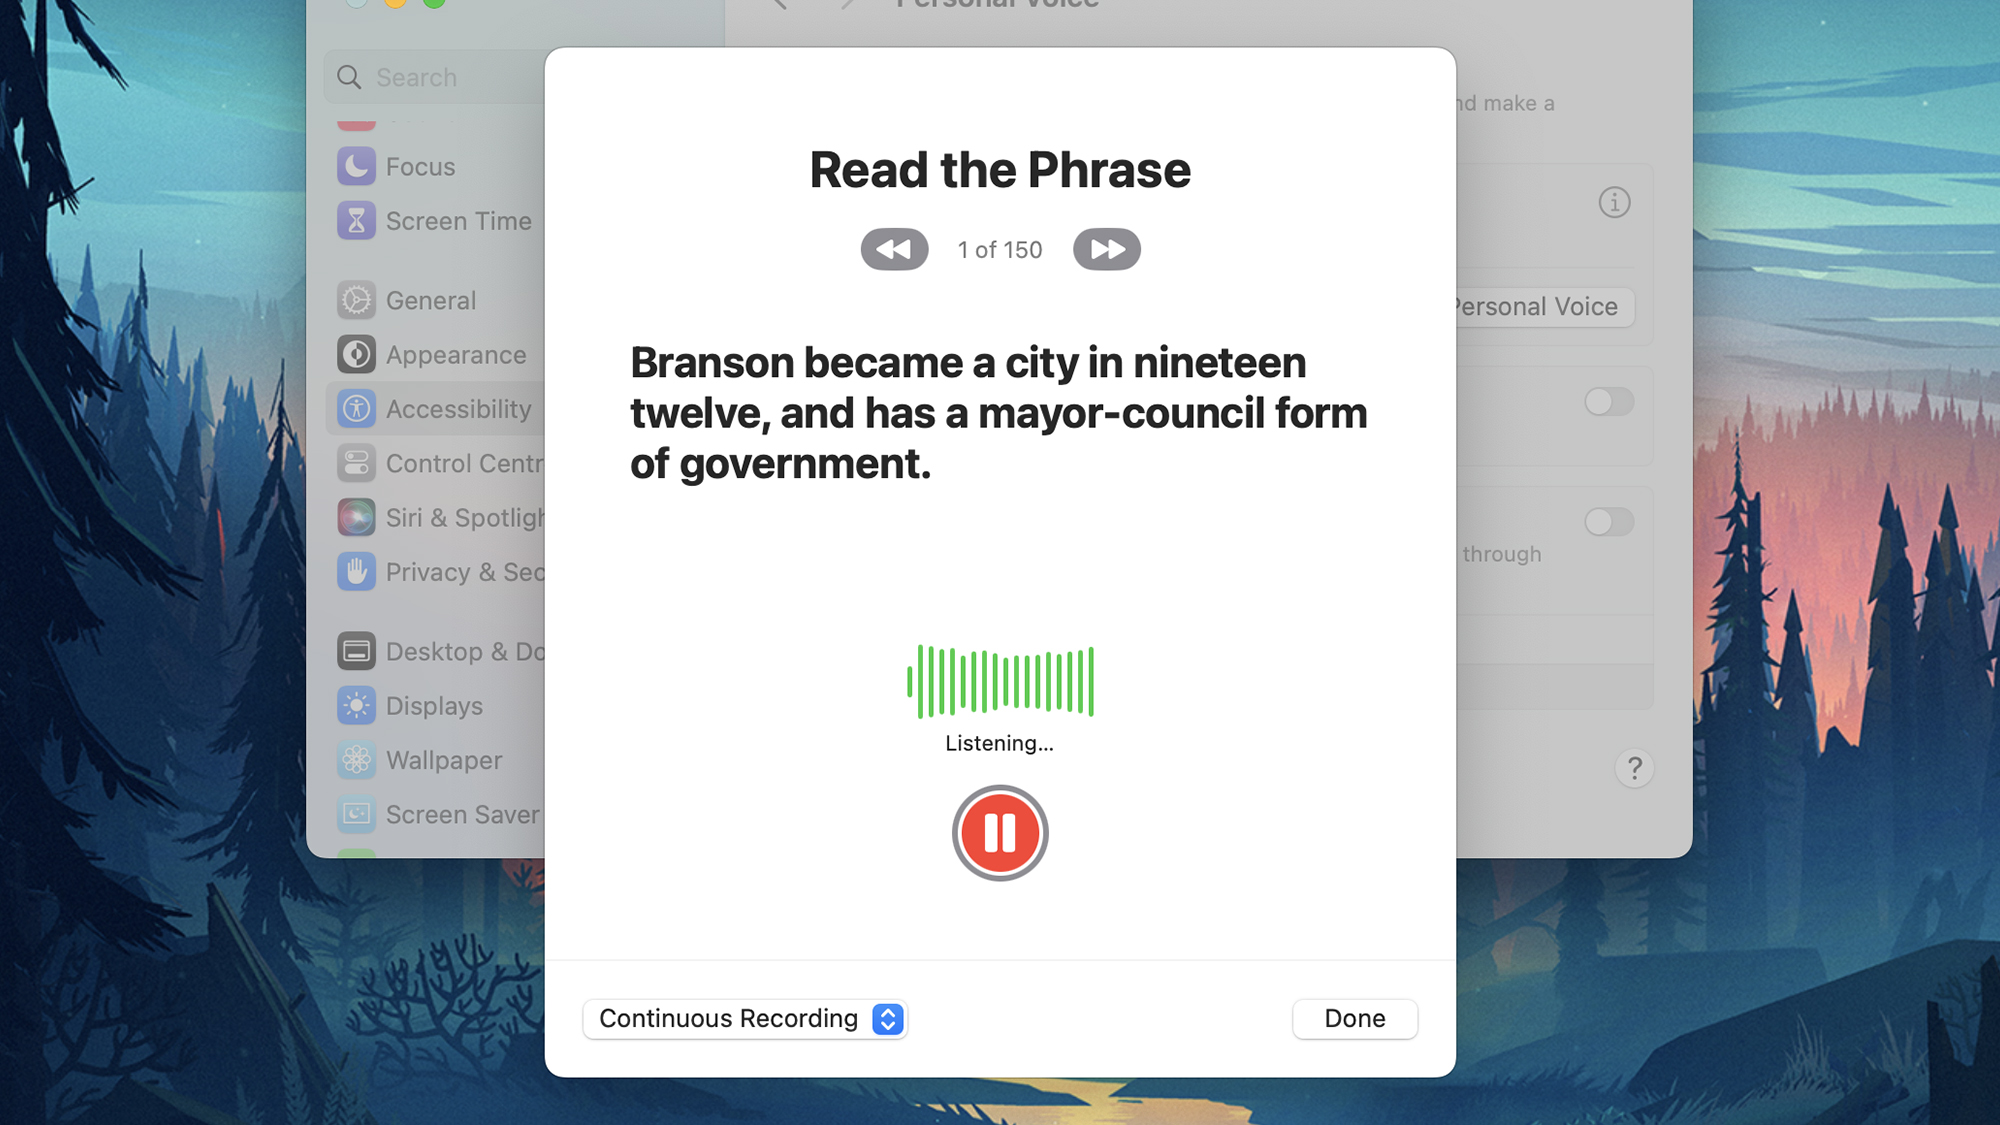
Follow the on-screen instructions to record your audio, give your voice a name, then repeat the phrases as prompted. To pause a recording session, tap or click the Completed or exit the recording window. Your recordings will be saved so you can access them when you need them. Note that the processing to create the voice may take several hours.
You can create more than one personal voice and use all the voices you have already configured from the same Personal voice Screen in Accessibility– just select the voice to bring up the delete option. You can also export the voice recordings you made if you want.
How to use Personal Voice
Go to the Accessibility And Personal voice screen on your iPhone, iPad or Mac, and you will see two toggle switches: one for Cross-device sharing and one to Allow applications to use your personal voice. Enable both to ensure your voice can be used on any device you’re signed in to with the same Apple ID.
Your personal voice can be used as part of another Apple accessibility feature called Live Speech. It’s exactly what it sounds like: your synthesized voice speaking to you in real time. To set it up, select Live speech from that Accessibility Menu on your Apple device – you’ll see your newly created voice appear as one of the speech output options, alongside the default system voice. On the same screen, you can also set up a collection of preset phrases.
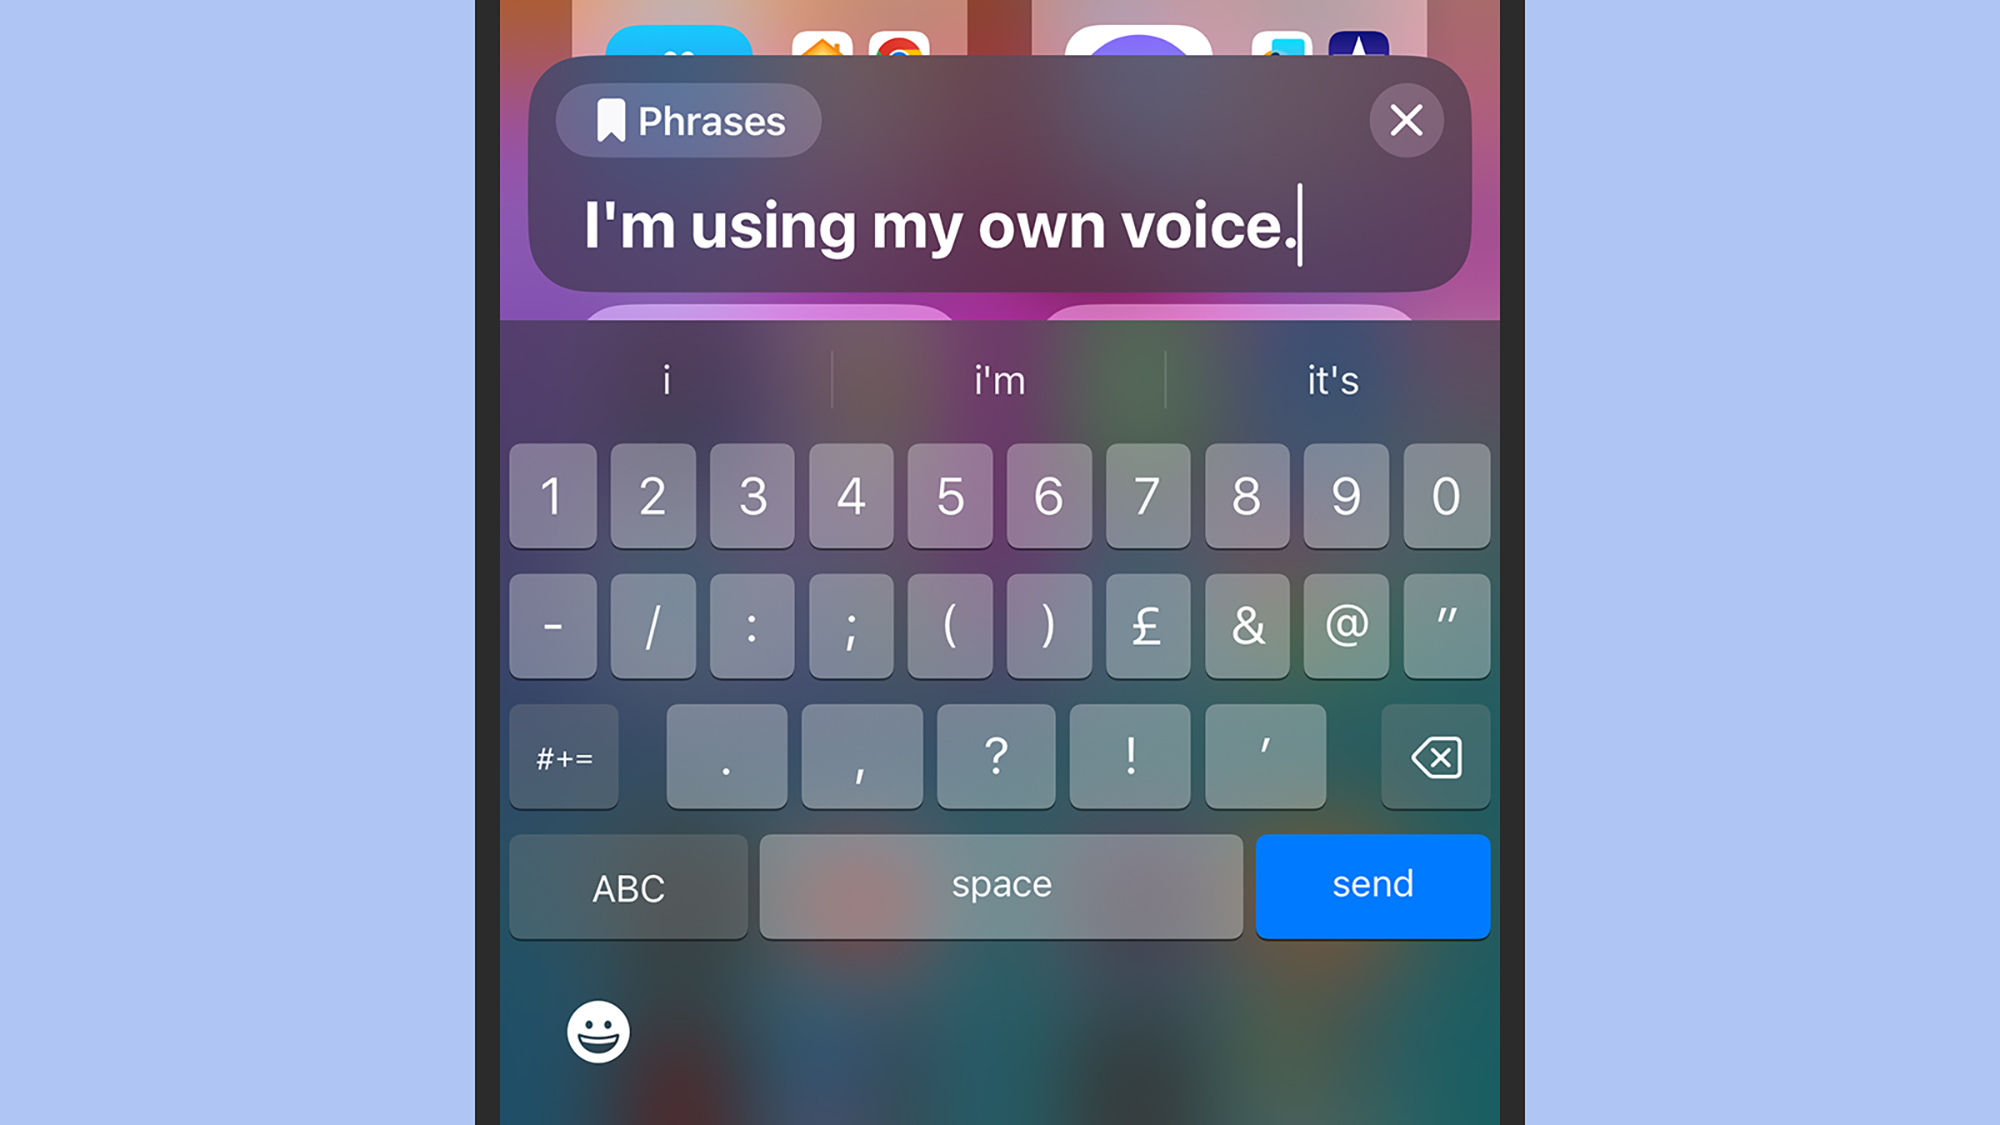
With Live Speech enabled, you can triple-tap the side button on an iPhone or iPad, or click the Live Speech icon in the menu bar on a Mac (it looks like a keyboard). You can then type a sentence that will be read aloud in your own voice. The sentence will still have a synthetic undertone, but the results are impressive.
The same Live Speech shortcut can be used when you’re in the Phone or FaceTime apps on your device, as well as any other apps that support the Live Speech feature. Whenever the text input field appears, you’ll see a bookmark icon inside it. Click or tap it to bring up your list of saved phrases.

NFL Hall of Famer Lawrence Taylor charged with failing to update his address on sex offender registry

Famous birthdays on July 18: Wendy Williams, James Brolin

